
Inlays can be used to create a dramatic look on a flat surface. Like many issues with designs for carving, the difficulty comes from needing to carve out shapes using a round bit. I’ve talked before about “the inside corner problem” and about visualizing the problem to create more carvable designs. Now I want to show you how to create inlayable designs, compensating for the bit size.
Here is the effect we are going for:

Anatomy of an inlay
An inlay project has two kinds of parts:
- The insert: the piece(s) cut entirely out that are layed into the…
- The pocket: the depression carved into a larger piece that the insert fits into.
The problem
Let’s take a simple design to illustrate the core problem. The simplest approach would be to take two copies of a single shape, carve inside one to make the pocket and carve outside the other to make the insert.
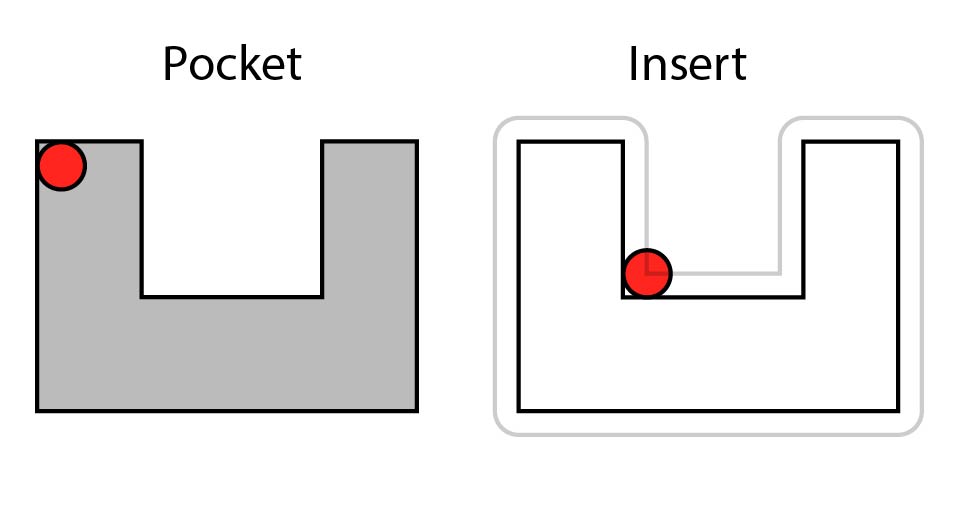
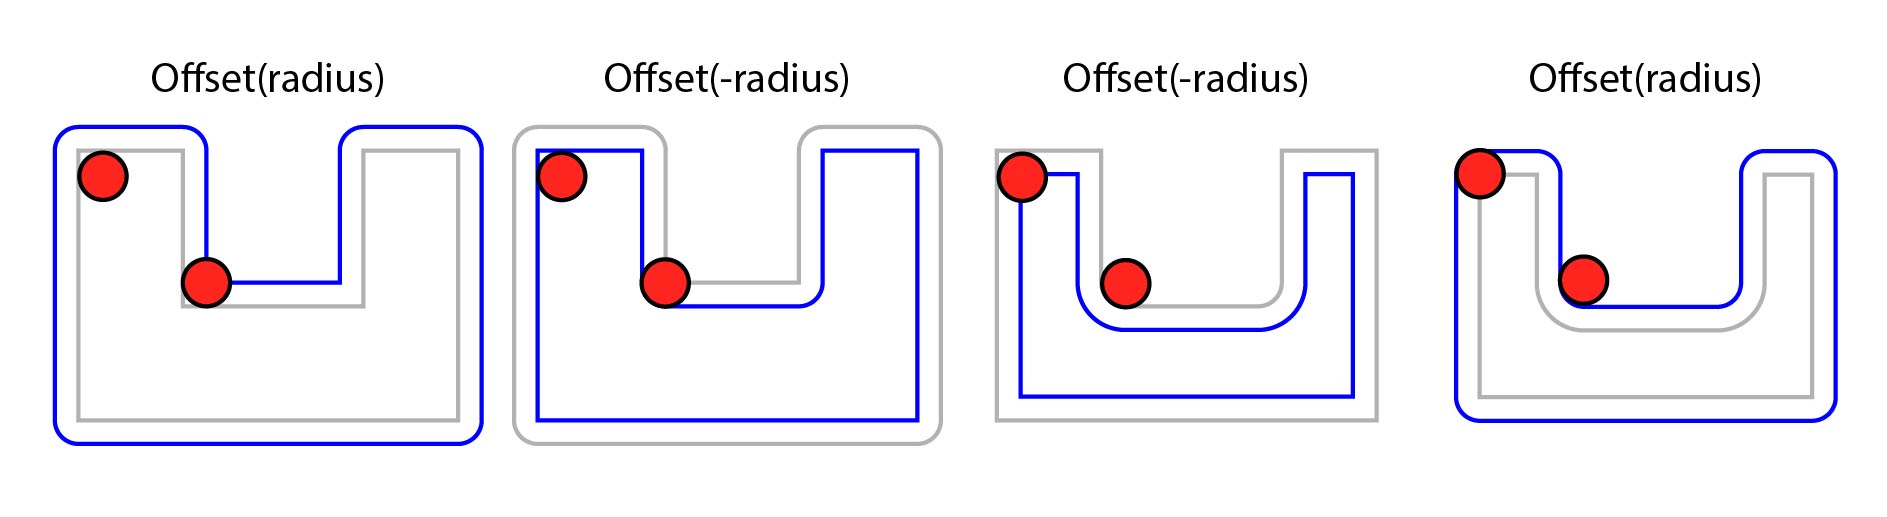
The red dot is the bit. Because it is a circle, it cannot fit into inside corners of the design. And which corners are “inside” is different for the pocket and the insert!


You end up with a different shape for the pocket and the insert; they will not fit together.


The solution
The solution is to create a new design that compensates for the rounding of the bit.
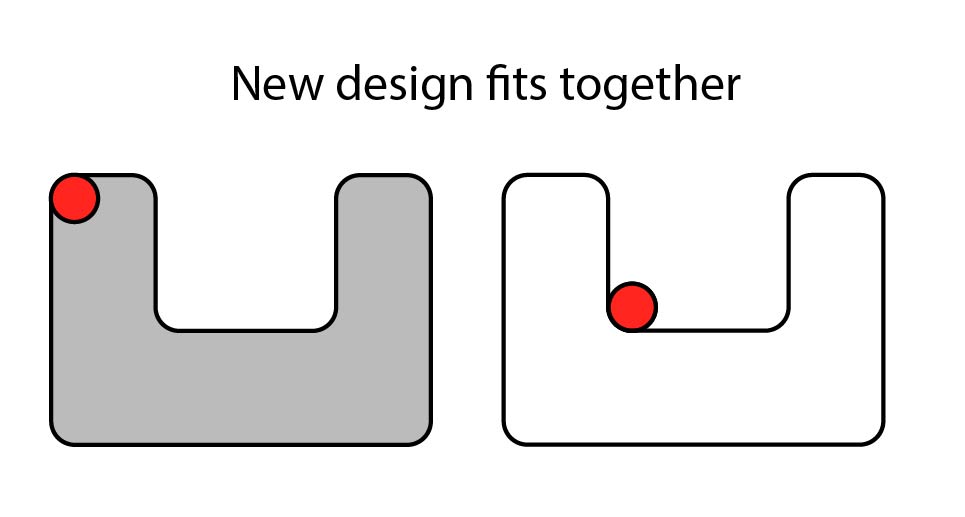
This is exactly the process the Inlay App in Easel does to create an inlayable design! Give it a try.