The amount of time it takes to carve out a design in Easel can have a big impact on your enjoyment of the making experience. The less time you spend waiting for your machine to turn material into dust, the sooner you can move on to the next step. We recently made some software improvements that can significantly reduce carving time, and I wanted to tell you how we did it.
A big component of how long it takes to carve a design is the tool path–a long chain of commands that tells the machine how to move over and through the work piece to remove the unwanted pieces of material.
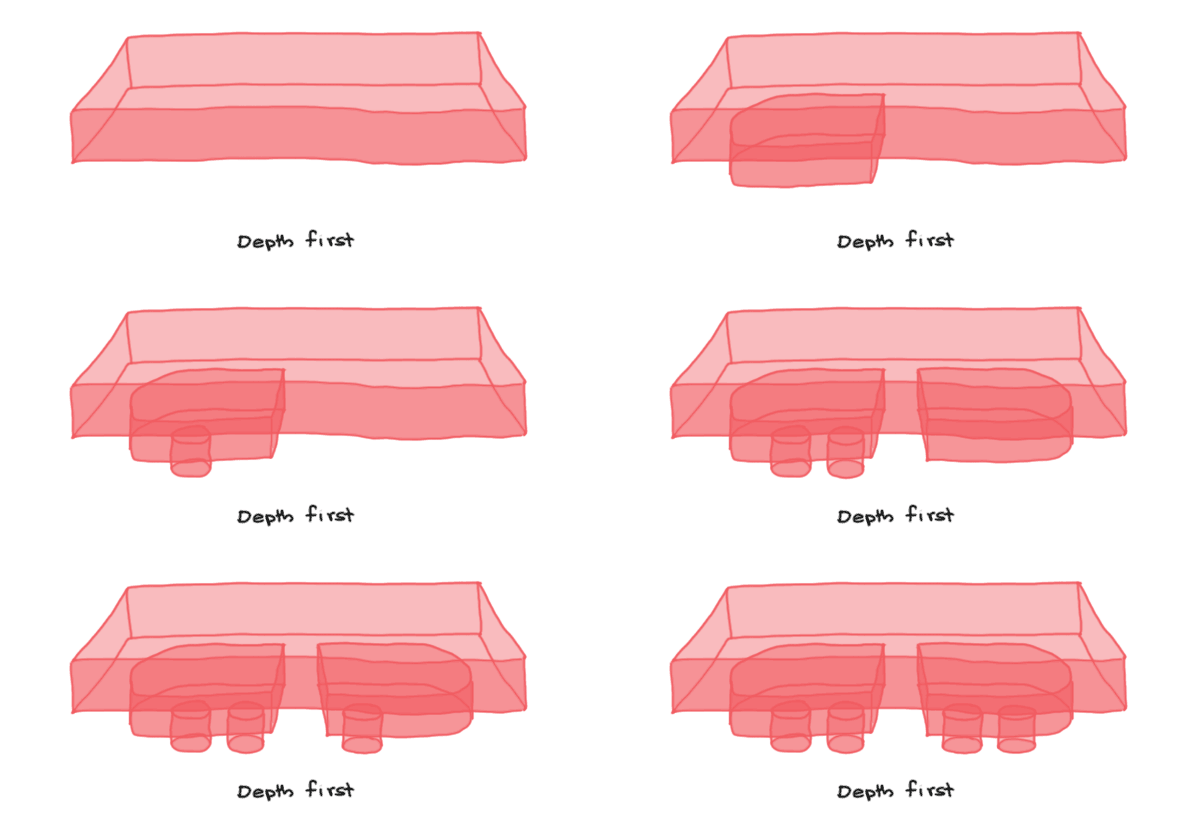
When we first launched Easel, its tool paths would carve out designs in a layer-by-layer approach, moving from one shape to the next until all carvable regions at a given depth were removed.

This led to a lot of commands to raise the spindle, move to a new region, lower the spindle, and process the next region.
The first improvement we made on this approach was to move towards a “depth-first” toolpath algorithm: all shapes that intersect each other are grouped as an object and carved at all layers before processing the next object.

In our initial implementation of this, we only grouped objects that overlapped with each other at the material’s surface. Easel still carved shapes nested within larger shapes in a layer-by-layer approach, moving from one shape to the next until all inner shapes at a given depth were completely carved.
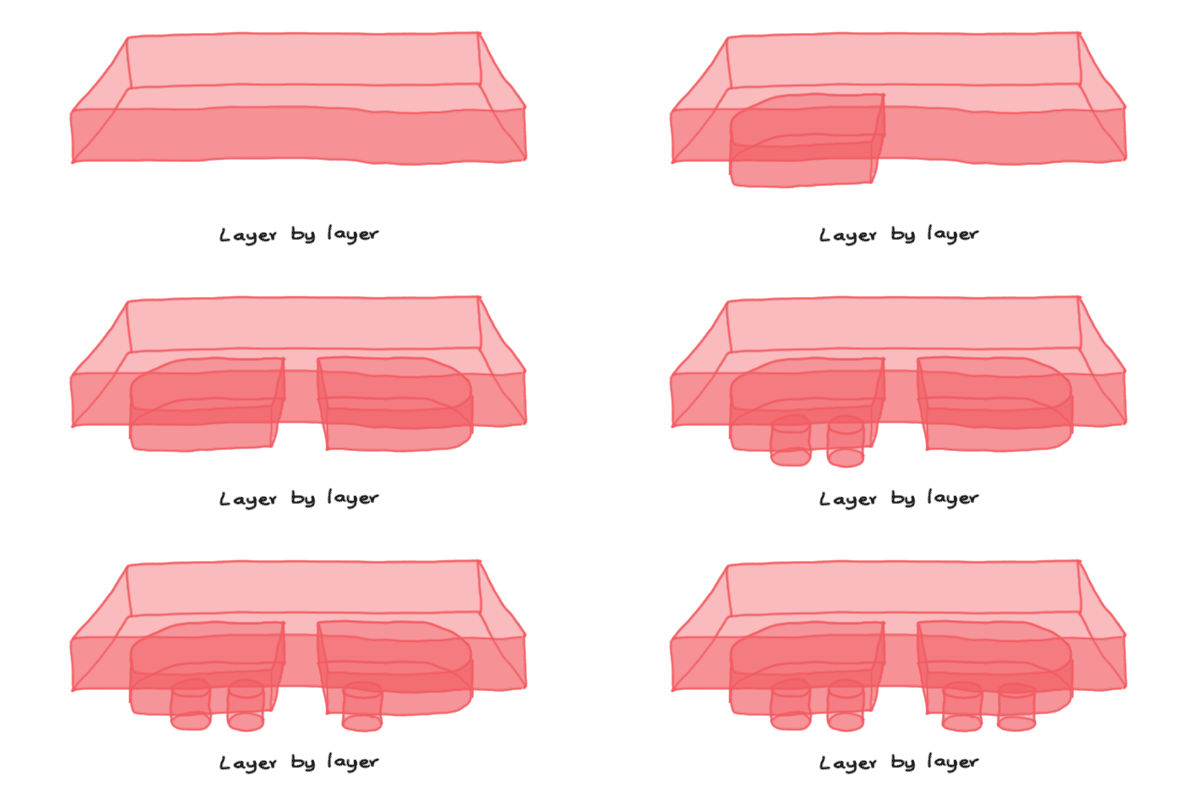
This improved job times considerably, but there was still room for improvement. Those nested shapes being carved layer-by-layer were still making jobs take longer than they needed to as the tool head wasted time moving back and forth between them.
Toward true depth-first carving
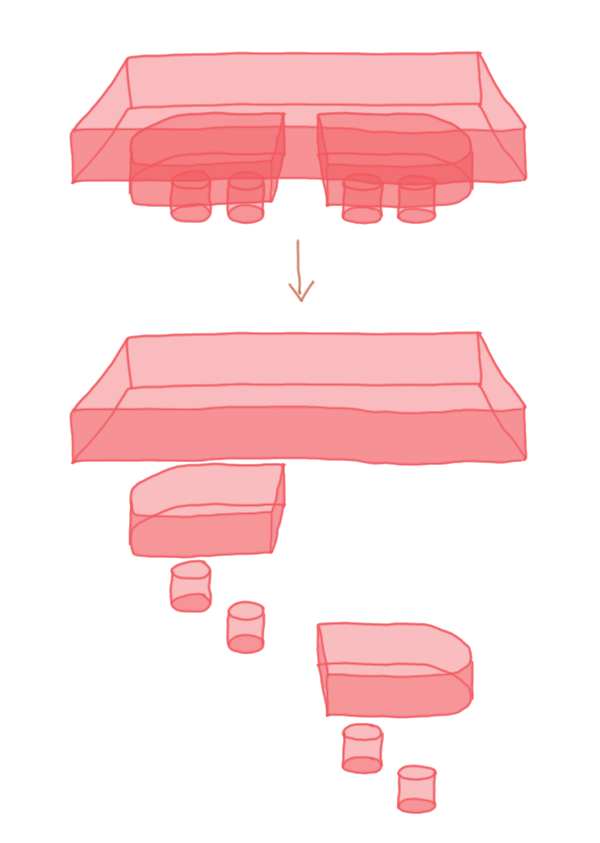
As we’ve seen, groups of shapes that overlap at the surface of the design might not overlap at deeper depths. Let’s take a closer look at our example:
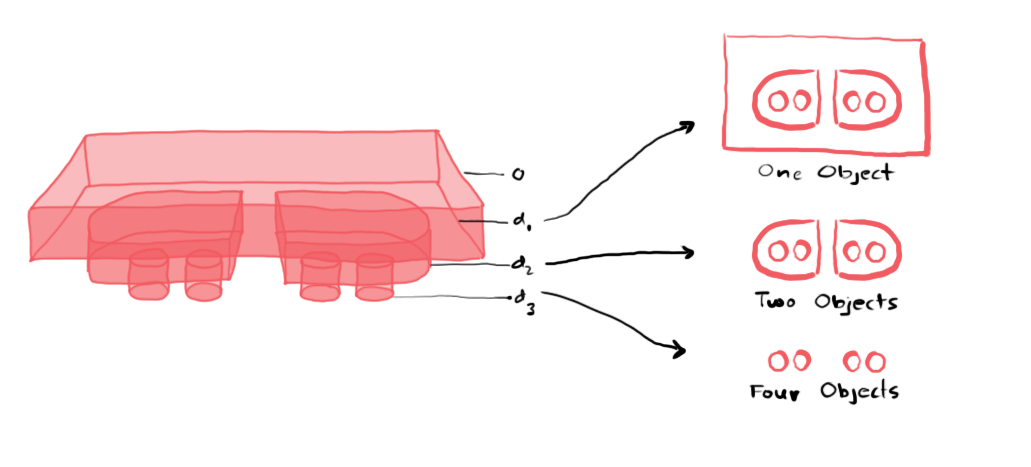
Above d1, all 7 shapes overlap, making 1 object. Between d1 and d2, the rectangle drops out, so there are 2 groups of overlapping shapes (and therefore 2 objects). Similarly, between d2 and d3 there are 4 non-overlapping shapes, making 4 objects.
We needed to make 2 key adjustments to our carving strategy in order to fully carve designs like these in a depth-first manner:
-
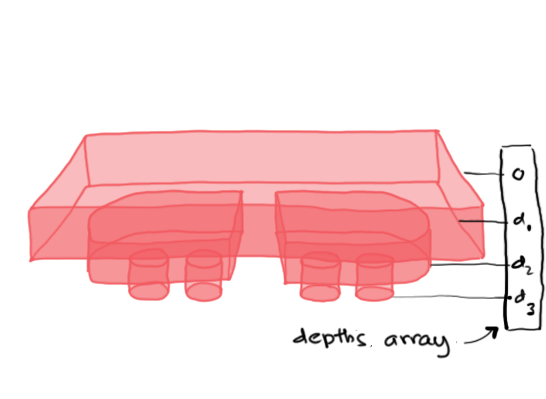
We needed to identify all of the depths in the design at which different groups of objects exist:
-
Whenever we reached one of those depths with the tool, we needed to recursively carve each object:
Pseudocode
Below is some pseudocode of the implementation we arrived at.
-
The function
findObjectsAtDepthreturns objects at a given depth. In line 3findObjectsAtDepthfinds objects at surface level (i.e. depth 0) -
Next, for each object, a depths array with unique depths is found using
findUniqueDepths. -
Finally, layers for each object are computed recursively using the function
generateLayersForObject. All object layers are joined into alayersarray and returned for toolpath generation.
Pseudocode for generateLayers(shapes)
 1. Input: An array of shapes with depth information.
 2. objs ← findObjectsAtDepth(shapes, 0);
 3. for all obj ∈ objs do
 4.   depths ← findUniqueDepths(obj);
 5.   objLayers ← generateLayersForObject(obj, depths);
 6.   layers ← objLayers ∪ layers
 7. end for
 8. Output: layers for toolpath generation.
Pseudocode for generateLayersForObject(object, startDepth, depths, index)
 1. Input: object: an array of shapes.
 2. endDepth ← depths[index];
 3. nestedObjects ← findObjectsAtDepth(object, endDepth);
 4. for all nestedObject ∈ nestedObjects do
 5.   createLayersBetweenDepths(nestedObject, startDepth, endDepth);
 6.   generateLayersForObject(object, endDepth, depths, index + 1);
 7. end for
 8. Output: layers.
Results
Here’s an animation showing the end result. All layer-by-layer carving has been removed, resulting in far less tool head movement, reduced carving times, and making happier carvers!
